I taught a group of ladies to make these at Valley Bible Church’s Create Day, and then friends started asking for instructions. So, kimchewcooks became kim chew cooks and crafts.
Materials list: twine, sweater sleeve or piece of sweater, thread or yarn similar color of sweater, hot glue gun, rice or beans or beads, polyfill (pillow filling)
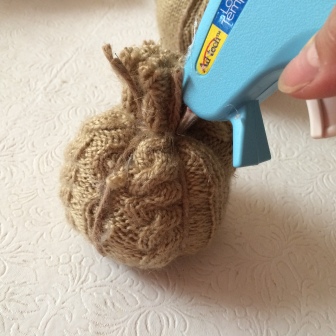
At points during this craft, you will be using hot glue. Tiny dots, the size of a grain of rice is all that is needed. If you haven’t used a hot glue gun before, squeeze very slowly and practice. I always put a piece of foil under my glue gun so that I don’t damage any surfaces. It there is too much time between uses of the glue gun, some glue will leak out. Wipe that away on the foil or with a piece of paper before using the glue gun. You will get strings of hot glue, wait until they cool and remove from the pumpkin.
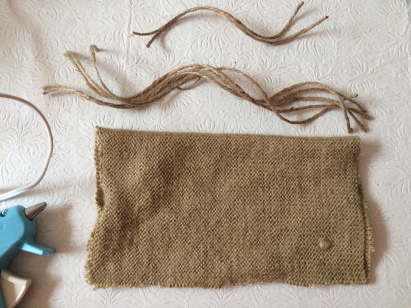
You can use a 1/2 sleeve from a sweater or if you want to cut up the torso of the sweater, you can make a tube. If using a piece of sweater, hot glue or sew wrong sides together to make a sleeve. Cut 2 pieces of twine the width of your sleeve. Cut 5 pieces of thread/yarn 1.25 the length of your sleeve. Cut 1 piece of twine 2 yards long (this will be used to cover the stem). Cut 1 piece of twine about 8″ long. (this will be the top of our stem)
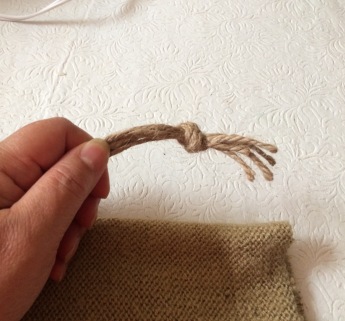
Gather the 5 pieces of yarn/thread and tie a knot at top of yarn/thread.
Place the tied yarn/thread inside the sleeve, hanging out the wider end. The sleeve should still be wrong side out. Tie a very tight knot with twine about 1″ from the larger end of your sleeve. The tied yarn should be sticking out the end.
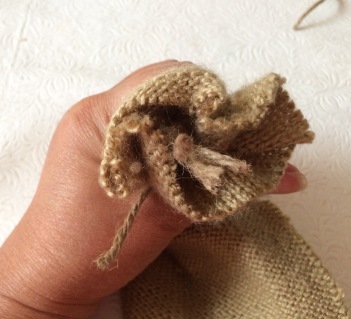
Pull the yarn/thread into the gathered end. Place a dot of hot glue inside the gathered end near the yarn/thread to secure it.
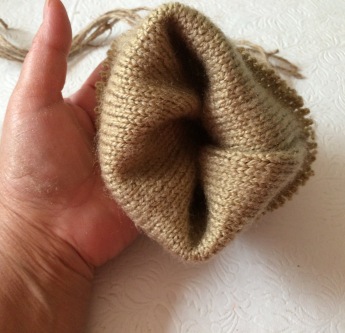
Turn the sleeve inside out.
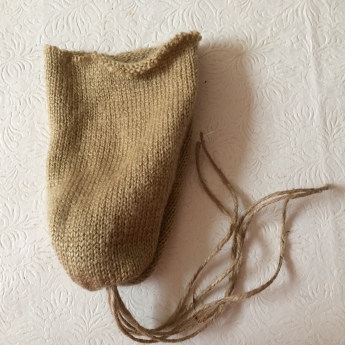
The 5 strings will be hanging out of the bottom. Put about 1/2 cup of rice/beans/beads (or just enough to form a base in the bottom. (If you have a loosely knit sweater, rice may poke through, so use plastic beads or dried beans.) 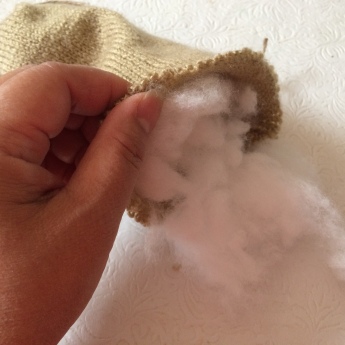 Fill pumpkin with fiberfill, leaving about 1-2″ gathered at the top. Push the polyfill around the rice/beans and shape your pumpkin as you fill.
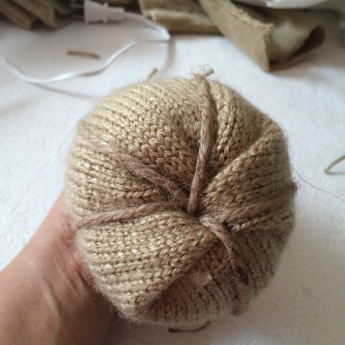
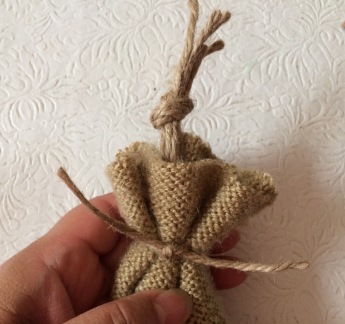
Turn the pumpkin sideways or upside down, while holding it closed. Spread the 5 threads/yarn evenly around the bottom and pull to the top. You can put one of the threads/yarn on the seam to help disguise it.
 Tie a piece of twine in a tight knot to make a stem. (the threads/yarns should be under the twine at top). Pull the fabric up to make the pumpkin tight. Pull the threads/yarn so that they make indentations into the pumpkin. The tighter you pull the threads/yarn the deeper your indentations will be. Hot glue the thread/yarn on the inside where it meets the twine.
 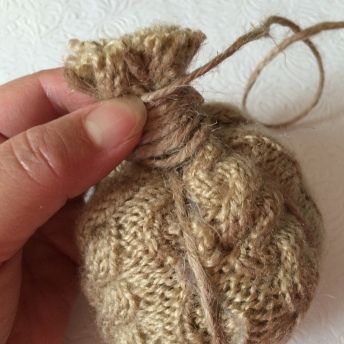 Position the threads/yarn up the stem. Tie a 2 yard piece of twine mid way up the stem (holding the threads/yarn under the twine).
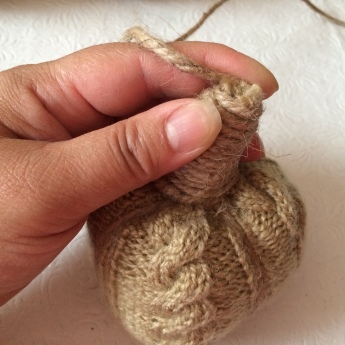 Wrap the stem tightly with the twine moving down and then up to the top. (Cover the first piece of twine at the bottom, covering all the glue spots) If you want a bent stem, bend the stem as you cover it. Secure the twine at the top with hot glue. You can trim the top of the sweater to level it after you have secured the twine.
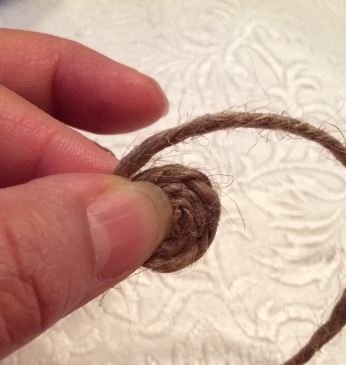
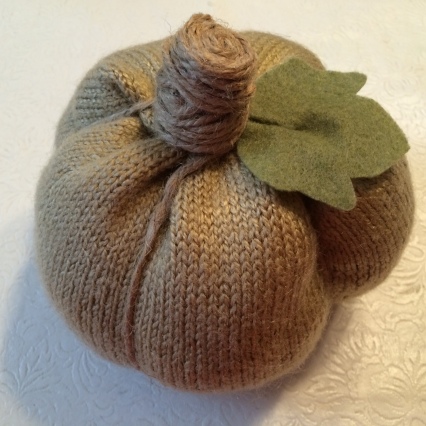
Using the 8″ piece of twine, make a coil, you can hot glue it along the way. This is the point where I always burn myself. You can start the coil by folding over a small piece of the twine (You can use a tweezer or toothpick to help here, just make sure you remove the tool before it becomes attached to the twine.) Secure the coil with tiny dots of hot glue to keep it together. Leave a 4″ tail on the coil. Make the coil the same size as the top of your stem. 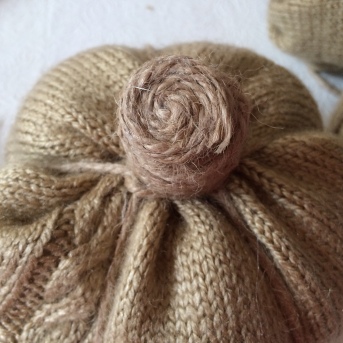 Glue the coil to the top, use the tail to hide the rest of the sweater and secure with hot glue.
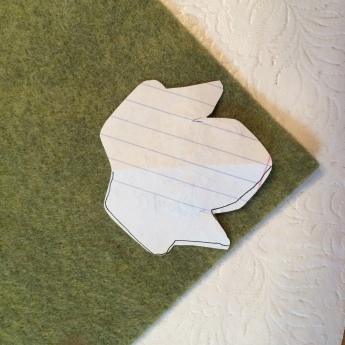 Cut a leaf from a piece of green felt. (if your stem is messy and the glue shows, you can also cut out a spiraled vine to glue next to the leaf)
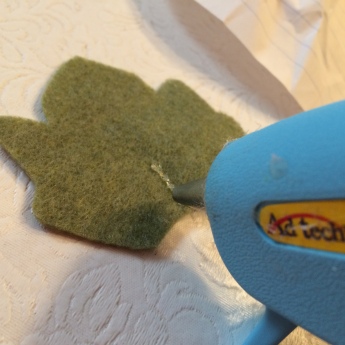
Place a thin line of glue near the bottom of the leaf.
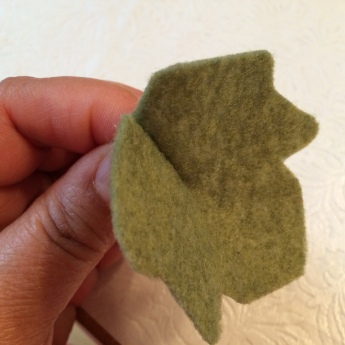 Pinch the felt on the glue line. (This just gives the leaf some dimension.)
 Secure the leaf with a dot of hot glue near the stem. Enjoy!

Thank you for sharing this! My daughter and I had so much fun making a bunch of little pumpkins from her pair of old hole-y orange pants!
LikeLike